Why order matters
Every upgrade changes how the house behaves, and later upgrades depend on earlier ones. If you replace an air conditioner before reducing the heat load, you may buy a larger, more costly system than you need. If you insulate before sealing air leaks, warm humid air may keep moving through the insulation and reduce its effect.
Think of the house as a system. Heat and moisture enter through the roof, walls, windows, doors, gaps and ducts. The air conditioner removes heat and moisture to keep the interior comfortable. Reducing what comes in first lets the equipment work less and last longer.
That logic points to a rough order: fix moisture and roof problems, seal air leaks, add attic insulation, repair ducts, consider shading and windows, then size and replace equipment if needed. The order is not rigid. A broken air conditioner in August will be replaced before anything else. But when you have a choice, this is the sequence that tends to give the most for the effort.
In what follows, we explain each step, what it does in a Florida climate and how it fits with the next. We are an insulation company and we say so. Where something is outside our trade, we will tell you which specialist should handle it.
Step zero: moisture and roof problems
Before any energy upgrade, deal with active water. A roof leak, a plumbing drip, a clogged condensate line or damp insulation will undermine anything added on top. Insulating over wet material traps moisture and can cause mold or rot.
Look for ceiling stains, musty smells, rusting fasteners in the attic and water marks on wood. If you see any, have the source identified and repaired by the right trade, then allow the area to dry. A technician can assess whether existing insulation is wet and needs removal.
This step also includes checking bath fans, dryer vents and kitchen exhaust. Fans that vent into the attic instead of outside add humidity right where you do not want it. Redirecting them is often inexpensive and valuable.
Our page on moisture in attic insulation explains the signs and what to do. Skipping this step is the most common way a good upgrade goes wrong, so give it a few minutes of honest looking first.
Step one: seal air leaks
Air leaks are paths that let air move between the house and the attic or the outdoors. In hot humid weather, they carry heat and moisture into the house. They happen around recessed lights, wiring and plumbing penetrations, the tops of walls, the attic hatch, chases and gaps at ducts.
Sealing them is inexpensive compared with most upgrades, and it makes later insulation more effective. Air moving through insulation reduces its performance, so keeping air still matters as much as thickness. Our air sealing page lists typical work.
A technician looks for leaks from the attic and may use simple tools such as a smoke pencil or a thermal camera. Some leaks are obvious: a gap around a chimney chase, an open top plate or an unsealed duct boot. Others require careful search.
Do not over-seal a home that has combustion appliances without checking that they have adequate air supply and venting. Gas water heaters and furnaces need combustion air. A responsible contractor will ask what appliances you have before sealing. If you smell gas or suspect carbon monoxide, leave the house and call 911 or your gas utility.
- Recessed lights and ceiling fixtures
- Plumbing and wiring penetrations through the ceiling
- Attic hatch or pull-down stair
- Tops of interior and exterior walls
- Duct boots and register edges
Step two: attic insulation
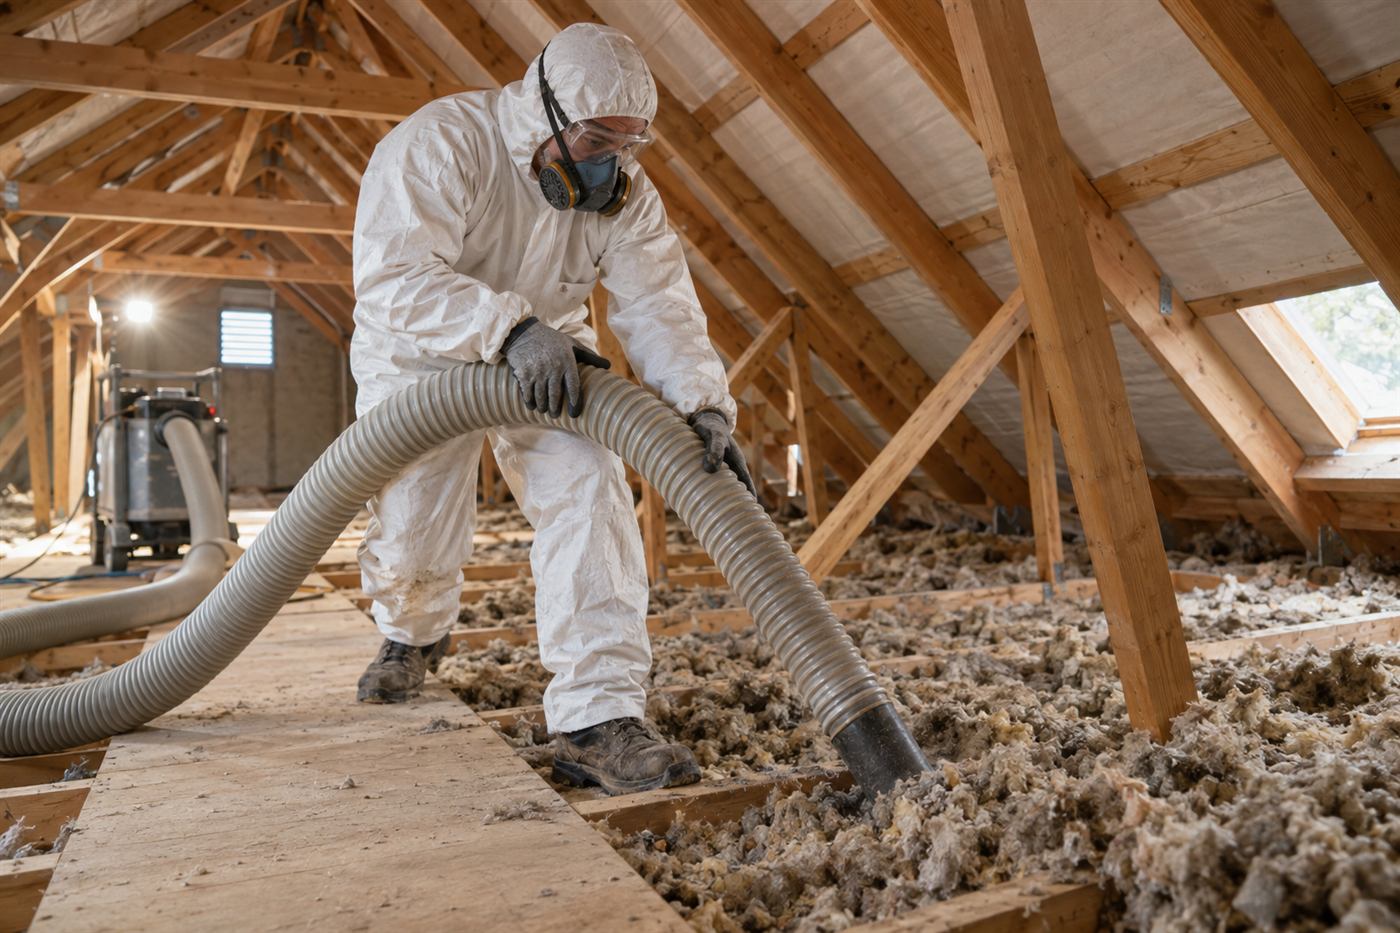
With leaks sealed, add insulation to the attic floor where it is thin, uneven, compressed or damaged. In many South Florida homes, the attic is the largest and most accessible heat path. Raising insulation depth and covering bare spots reduces heat flow into the rooms below.
Material choice, depth and coverage depend on the home. Our guide on how much attic insulation you need explains how depth relates to thermal performance, and the page on attic insulation describes options.
Keep ventilation channels open at the eaves with baffles, keep insulation clear of flues and recessed fixtures that are not rated for contact, and insulate the attic hatch. These details are easy to miss and make a difference.
Where the attic holds the air handler and ducts, consider whether a sealed attic approach is better than floor insulation. That is a bigger decision, discussed in our guide on spray foam versus blown-in insulation. For most homes, floor insulation plus duct work is the more straightforward route.
Step three: ducts
Ducts that run through a hot attic lose cooling in two ways: air leaks out through gaps, and heat enters through the duct walls. Leaky ducts can also pull hot humid attic air into the system. All of this makes the air conditioner run longer and leaves some rooms under-cooled.
Sealing duct joints, repairing disconnected sections, replacing crushed or torn runs, and insulating ducts properly can change how a house feels. It can also affect how the equipment should be sized, which links to the next step.
Some of this work falls to heating and cooling contractors rather than insulation crews, and we will say where that is the case. Duct insulation and attic conditions are part of what we look at during a visit.
If a particular room never cools, check whether its duct is kinked, disconnected or buried. Our page on uneven room temperatures describes how ducts, insulation and air leaks combine to cause that common complaint.
Step four: shading and windows
Windows let in heat by sunlight passing through glass. West and south exposures are the biggest contributors in this climate. Before spending on replacement windows, consider shading: awnings, exterior screens, window film, blinds and trees can cut solar heat gain for far less.
Replacement windows can help, especially if existing ones are single-pane, leaky or damaged, but they are a larger project with a longer payback. They matter more once the attic and air leaks are dealt with, because by then you can judge the remaining problem more clearly.
Impact-rated windows are often chosen for storm protection as well as comfort. If you are replacing windows for that reason, add energy considerations to the choice, but do not expect windows to fix attic heat.
Window decisions are outside our trade, and we will not pretend otherwise. We mention them here because they belong in the sequence. If you are comparing options, an independent energy rater or a window specialist can help estimate the effect for your house.
Step five: equipment sizing and replacement
An air conditioner sized for a leaky, poorly insulated house will be larger than needed after improvements. Oversized equipment cycles on and off, cools quickly but removes less moisture, and can leave the home feeling clammy. Right-sizing after reducing the load is better for comfort and humidity control.
If your system is failing and must be replaced soon, that is a reason to do the cheaper load-reducing steps quickly, so the replacement can be sized for the improved house. If the system is working, it can make sense to improve the house first and see how the existing equipment performs.
Our guide on how insulation changes AC size needs explains the reasoning. Ask any heating and cooling contractor to do a proper load calculation rather than size by the old unit's tonnage.
Equipment selection, refrigerant, efficiency ratings and installation quality are matters for that trade. We simply ask that you give them accurate information about the changes you have made.
| Step | What it addresses | Why it comes here |
|---|---|---|
| Moisture and roof | Active water entry | Anything added over wet material can fail |
| Air sealing | Leaks around the ceiling plane | Makes insulation perform as intended |
| Attic insulation | Heat flow from the roof | Largest heat path in many homes |
| Ducts | Leakage and heat gain in the attic | Improves delivery of cooled air |
| Shading and windows | Solar heat through glass | Judged better after other steps |
| Equipment | Cooling capacity and humidity control | Sized after the load is reduced |
When the order has to bend
Real life does not follow a tidy sequence. A failed compressor, a hurricane repair, a remodel or a home sale can force decisions. That is fine. The sequence is a guide, not a rule.
If you must replace equipment right away, ask the contractor to size it conservatively and discuss planned envelope improvements. If you are replacing a roof, ask whether insulation or air sealing should be done before or after, since roof work can disturb the attic and expose areas.
If you are buying a home, an inspection and an attic look can help you plan. Our guide on insulating concrete block homes and the one on condo units show how housing type changes priorities.
If budget limits you to one step, the attic combined with air sealing is often the best starting point. A technician can tell you whether that holds for your house.
Habits and small steps that cost little
Some of the most useful steps need no contractor. Keep the thermostat at a steady setting instead of swinging it wildly, since a house that has soaked up heat takes a long time to recover. Use ceiling fans in occupied rooms only, because fans cool people, not rooms. Close blinds on sun-facing glass during the afternoon.
Change air filters on the schedule your equipment calls for, and keep supply and return vents unblocked by furniture or rugs. A clogged filter or a blocked return makes the system work harder and can cause icing on the coil.
Check the outdoor unit for debris, vegetation crowding and standing water around the pad. Make sure the condensate drain line is clear, since a clogged line can shut the system off or cause water damage. These are routine maintenance items, and your cooling contractor can walk you through them.
None of this replaces insulation or sealing, but it supports them. A well-insulated house with a neglected system will still disappoint, and a tuned system in a leaky house will keep struggling.
Measuring whether an upgrade worked
It helps to know your starting point. Before any work, note which rooms are uncomfortable and when, glance at several months of electric bills, and take photos of the attic. After the work, compare comfort in the same rooms and the same kind of weather. Bills vary with weather, occupancy and rates, so compare similar months rather than adjacent ones.
Do not expect a single dramatic change from every step. Air sealing may show up as a house that holds its temperature and feels less sticky. Attic insulation may show up as a cooler ceiling and bedrooms that stay comfortable later in the day. Duct repair may show up as a room that finally gets air.
If nothing changes, ask why. It may be that the biggest problem was something else, such as a failing system, a blocked return or a hot west window. A good contractor will be willing to revisit the findings with you rather than insist the work was perfect.
Planning with a technician
A good visit for an energy plan starts with questions about comfort and bills, then an attic inspection, a look at ducts and air handler, and a conversation about what you plan to do with the home. The result should be a short list in a sensible order with reasons.
You should leave knowing what is urgent, what is useful and what can wait. If an upgrade falls outside our trade, we will say so and suggest which specialist to consult.
Quotes are given by phone only, and complicated jobs need an on-site visit first, with a service call charge explained on the phone before dispatch. Call, describe your home and your goals, and we will help you decide where to begin.
Questions people ask
What should I upgrade first to lower cooling costs?
First deal with any moisture or roof leaks. Then seal air leaks and add attic insulation where it is thin, since the attic is the largest heat path in many homes. Ducts come next, then shading and windows, and equipment last. A technician can confirm whether that order fits your house.
Should I replace my air conditioner before adding insulation?
If the unit still works, it is usually better to reduce the heat load first, then judge what size you need. If it has failed, replace it, but ask for a proper load calculation and mention planned improvements so the new system is not oversized. Oversized equipment can leave the home clammy.
Why seal air leaks before adding insulation?
Air moving through insulation reduces its effect and carries heat and moisture into the house. Sealing gaps around lights, wiring, plumbing and the attic hatch first lets the insulation work as designed. It is also relatively inexpensive compared with other upgrades and is often done during the same visit.
Are new windows worth it before attic work?
Usually the attic comes first, since it is a larger heat path and easier to improve. Shading is a low-cost way to reduce window heat gain. Replacement windows make more sense after other steps, or when you need them for storm protection or condition. Window choices are outside our trade.
Does sealing a house cause problems with gas appliances?
It can if combustion appliances do not have enough air or proper venting. A responsible contractor asks what appliances you have before sealing. If you smell gas or suspect carbon monoxide, leave the house and call 911 or your gas utility. Do not rely on a web page for safety questions.
How do you price an energy upgrade plan?
Pricing is given by phone only, based on what we learn about your home. Complicated work needs an on-site visit first, with a service call charge explained on the phone before anyone is dispatched. Work outside our trade, such as windows or equipment, is quoted by those specialists.
Describe the situation by phone and we will tell you what the job involves. Quotes are given by phone. Jobs that cannot be quoted without seeing them need a technician on site, and the service call charge is explained on the phone before anyone is dispatched.
(561) 854-1888Related pages
Turning the order into a working plan for your house
A sequence on paper only helps if you can apply it to the building you live in. Begin by writing down what actually bothers you: a room that never cools, a damp smell in a closet, a cooling system that runs most of the afternoon. Each complaint points toward a different first step, and a short list keeps a conversation with a contractor focused instead of drifting toward whatever product is being discussed that day. This kind of written list also makes it easier to compare advice from different people, because you can see which step each recommendation belongs to.
Then sort the items into three groups: things that protect the house, things that reduce how hard the cooling system works, and things that improve comfort at the edges. Moisture and roof concerns belong in the first group and should be settled before anything gets covered up. Air sealing and attic work belong in the second. Shades, window treatments and thermostat habits fill out the third, and they can usually be handled at any time. It helps to note which items you could do yourself on a weekend and which need a trade, so you do not wait on a contractor for something simple like replacing a filter.
Finally, leave room for the plan to change once someone has been in the attic. A technician may find a duct disconnected, a bath fan venting into the insulation, or an area where earlier work was disturbed. Treat the list as a draft, ask for the scope and any quote to be explained before work begins, and do the steps in an order you understand rather than all at once. Keep the draft where you can find it, and update it after each visit with what you learned. A plan that changes as facts arrive is healthier than one that stays fixed, and it keeps you from feeling committed to a step that no longer makes sense for the house.