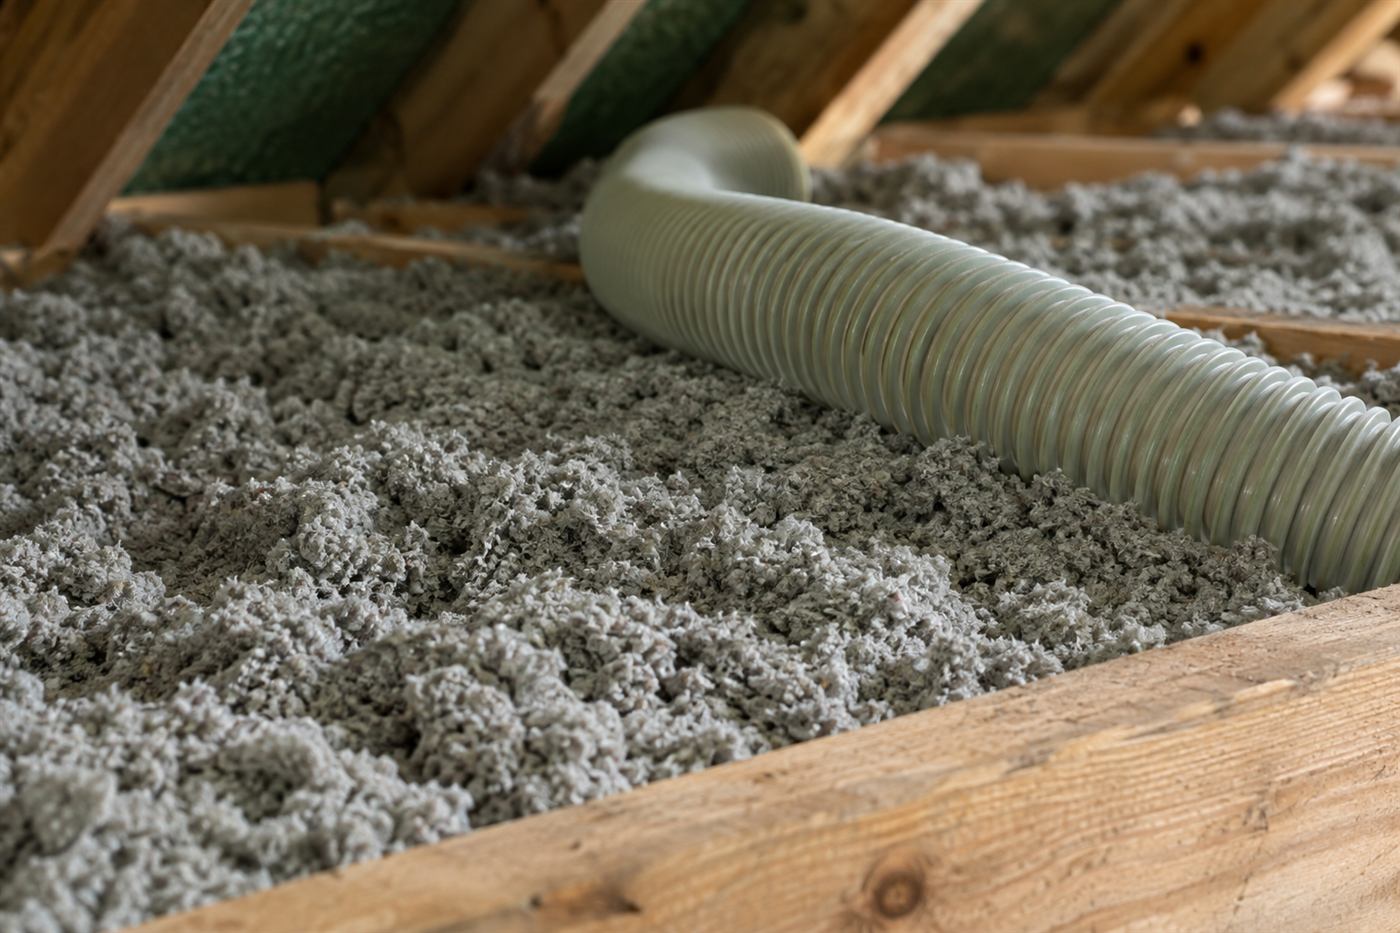
Why spring is the right time
By March and April, winter is behind you and the heavy heat has not yet arrived. Attic temperatures are bearable for short looks, roofers and technicians have more flexibility in their schedules and any problem you find can be fixed before the wet months begin. It is also a natural point to prepare for hurricane season, which opens in early summer.
A spring check catches the quiet damage that builds over the cooler months. Small roof leaks from winter fronts, pests that moved in for shelter, insulation disturbed by a repair visit and vents blocked by debris all are easier to handle now than in August, when the attic is at its worst and the house is under heavy cooling demand.
This walkthrough is meant for owners, not for professionals. It keeps you safe by staying mostly outside the attic and by marking clear points where you should stop and call someone. If any step feels uncomfortable, skip it. A photo from the hatch and a phone call give a technician plenty to work with.
Before you start: safety rules
Attics hold hazards that are easy to underestimate. They are hot, dusty, dim and full of things you should not touch. The ceiling below the insulation is usually thin drywall that will not hold a person, so you must stay on framing or not enter at all. Wiring, junction boxes and sometimes old insulation materials may be present.
Pick a cooler morning hour, tell someone you are going up and do not go alone. Use a sturdy ladder on a level surface, wear long sleeves, gloves, closed shoes, eye protection and a dust mask, and bring a bright flashlight. Do not carry anything that stops you using both hands on the ladder.
Stop and call a professional if you see active water, exposed or damaged wiring, signs of rodents or a strong chemical or burning smell, or if the attic is already very hot. Do not touch wires or cut anything. Never use an open flame for light. If someone feels dizzy or unwell, climb down and get fresh air, and call 911 in an emergency. Our guide on insulation safety and dust offers more detail.
- Choose a cool morning and have someone nearby
- Wear long sleeves, gloves, eye protection and a dust mask
- Stay on framing, never step on drywall or insulation alone
- Do not touch wiring, junction boxes or damaged materials
- Stop and call if you see water, pests, or anything unsafe
Step one: look at the roof from the ground
Start outside. With binoculars if you have them, walk around the house and look at the roof. Check for missing, lifted or curled shingles, slipped or cracked tiles, rusted or lifted metal flashing, damaged ridge caps and sagging lines. Look at vent pipes, chimney edges and anywhere the roof meets a wall.
Look at the soffits, the underside of the roof overhang, for gaps, holes, peeling paint or signs that animals have entered. Check that soffit vents are not painted shut or covered by debris and that gutters, if you have them, are clear. Overgrown tree branches touching the roof should be trimmed, since they scrape surfaces and give rodents a path.
Never climb onto the roof for this. Use the ground view and note anything you want a roofer to examine. A roofer handles repairs, and a technician can add information from inside the attic. For a related checklist before the storm season, see pre-hurricane-season insulation checks.
Step two: check ceilings and walls inside the house
Walk through every room with the lights on and look up. You are searching for brown or yellow stains, ripples in paint, hairline cracks or sags in the ceiling and any musty smell. Check closets, hallways and the area directly below the attic hatch, which sees the most air and dust movement.
Pay attention to rooms that feel warm or cold compared with others, since uneven temperatures often trace back to the attic. Note whether the cooling system runs constantly and whether certain vents blow weakly. Look at recessed light fixtures for dark rings around them, which can indicate dust carried by air leaking from above.
Take dated photos of anything that looks suspicious. A stain that is the same size next spring is old news. One that has spread is not. Our page on uneven room temperatures explains what the patterns can mean.
Step three: the attic hatch and what you can see from it
Open the hatch with care, because debris and insects can fall. Stay on the ladder and shine the flashlight across the space in several directions. You are looking at the top of the insulation, the framing, any ducts and the underside of the roof deck.
Notice the insulation first. Does it look fairly even and fluffy, or flat, patchy and discolored? Are there bare spots, tracks where an animal has run, or clumps where water has soaked in? Do you see the tops of the ceiling joists, which suggests it is thin? Look at the attic hatch itself, which should have some insulation or weatherstripping.
Next, look at the roof deck underside for dark stains, rust on nails or damp wood, and at the ducts for torn wrap, sagging runs or drops of water. Notice any strong smell. If you see anything alarming, do not step in to investigate. Take photos and call. A technician can enter safely and tell you what it is.
Step four: insulation, vents and airflow
Insulation should reach the edges of the attic without covering the soffit vents. At the low edge where the roof comes down, there should be a clear channel for air to move upward. If insulation is stuffed against the soffit, airflow may be blocked.
Look near the ridge or high vents to see if daylight shows through or if there are signs of wind-driven rain. Check that any attic fans, if present, turn freely and are not coated in dust. Remember that more vents are not always better, and mixed systems can work against each other.
Do not move insulation around, and never pack it tightly. Compression reduces its value. If you suspect blocked soffits or uneven depth, a technician can correct it properly. Our page on attic ventilation explains common problems and what changes help.
Step five: ducts and the air handler
If the air handler is in the attic or the ducts run through it, spring is when you want them in good shape for the cooling season. From the hatch, look for sections of duct that have sagged, kinked or pulled away from connections and for torn or missing outer wrap.
A little dust on duct surfaces is normal, but wet marks, rust streaks and drips are not. Look under and around the air handler for water in the pan or signs of overflow. A dry pan and clear drain line matter in humid weather.
Duct repair belongs to an air conditioning specialist, and the best response to a damaged section is to photograph it and call. A technician from our side can check the wrap and note what needs repair. Our page on sweating ductwork in the attic describes the moisture side.
Signs of pests and what they mean
Rodents and other pests often move into attics in cooler months. Look for droppings, tunnels in the insulation, shredded material, chewed wire coverings, greasy rub marks on framing and nests. Insects such as wasps may build nests under eaves and around vents.
Pest activity affects insulation, because animals compress and contaminate it and may chew wires, creating a safety risk. Droppings can carry health concerns, so avoid stirring up dust or touching them without protection. Do not set poison inside the attic without advice, since poisoned animals can die in inaccessible spots.
If you see signs of pests, the right order is to stop the entry, remove the animals through a qualified pest professional, then repair and replace affected insulation. Our page on rodent damage to insulation explains what that process looks like.
Garage, lanai and storage areas that connect to the attic
Spring is also a good moment to look at the spaces that sit beside or beneath the attic. A garage ceiling that doubles as the floor of a room above, an access panel inside a closet, a pull-down stair and a knee-wall door in an upstairs bedroom are all common routes into the attic zone, and all can leak air or hide damaged insulation.
Check that panels and doors close tightly and have some insulation on their attic side. A hatch that does not seat properly lets conditioned air out all year. Look for gaps around the pull-down stair frame and for light shining through cracks, which signals an air path.
In a garage, notice the ceiling surface for stains, sagging drywall or gaps near the walls. Stored boxes pressed against the ceiling can hide trouble. Our page on garage insulation describes how those shared surfaces are usually treated.
What to leave for a professional even in spring
A walkthrough shows you symptoms. It does not diagnose causes, and a few jobs should never be attempted by an owner. Anything involving electrical work, roof repair, removing wet or contaminated insulation, dealing with pests, repairing duct connections or entering the attic in heat belongs with someone trained and equipped for it.
That is not a statement about your ability. It is about exposure. Attic work combines heat, falls, dust, hidden wiring and, in some homes, older materials that need careful handling. Professionals plan access, use protective gear and know what to do when something unexpected turns up.
Your role is to notice, record and describe. A clear description with photographs saves time, helps the technician arrive prepared and keeps the visit focused on the real concern. It also lets you decide how urgent the problem is before you call.
A simple spring record to keep
Write down what you see and the date. A short log with photos of the roof from the ground, the hatch view of the insulation, any stains and the duct condition builds a baseline you can compare each year. Changes become obvious, and you can tell a technician exactly when something appeared.
Include basic information: roof type and approximate age if known, insulation type if you know it, whether the air handler is in the attic and any repairs or contractor visits. Keep paperwork in a folder or digital file, along with photographs.
That record is also useful for insurance or resale conversations. It shows that you maintain the home and helps others understand its history. Our guide on how long insulation lasts explains why periodic checks matter.
When to call instead of climbing
Call if you see water, wet or flattened insulation, droppings or nests, torn duct wrap, daylight where it should not be, blocked vents or bare spots larger than a small patch. Also call if you are not sure what you are looking at, if anyone in the household has mobility or breathing issues or if the hatch is hard to reach.
A professional visit covers what you cannot safely see. The technician checks insulation depth and coverage, airflow, air leaks around fixtures, wiring and plumbing penetrations and any roof deck stains. They explain what they found and what options exist.
Quotes are given by phone after you describe the home and what you observed. Complicated jobs need an on-site visit first, and there is a service call charge, explained on the phone before dispatch. When you are ready, call and tell us what you saw, and we will explain the next step.
Questions people ask
Is it safe for me to go into the attic myself?
Only with care. Attics are hot, dim and full of hazards such as thin drywall, wiring and pests. Stay on a ladder at the hatch if you can, never step on insulation or drywall, go on a cool morning and not alone. If you see water, wiring damage or pests, stop and call a professional.
How often should I check my attic?
A visual check once a year in spring is a sensible habit, with an extra look after a major storm or if you notice stains, odors or comfort changes. Keeping dated photos helps you compare year to year. A professional visit is appropriate whenever something looks wrong or you want a closer look.
What does healthy insulation look like from the hatch?
It looks fairly even across the attic, without large bare spots, flattened tracks, dark stains or clumps. It reaches the edges without blocking the soffit vents, and you cannot easily see the tops of the joists. If it looks patchy, wet or disturbed, a technician can assess it.
Should I clean up pest droppings in the attic myself?
It is better not to. Droppings can carry health risks and disturbing them spreads dust. Use a pest professional to handle the animals and entry points first, then have insulation checked and replaced if needed. If you must be near the area, wear a mask, gloves and eye protection.
Can I add insulation myself after the walkthrough?
Some owners do, but it is easy to compress material, cover vents or disturb wiring, and attic work carries heat and fall risks. A technician checks depth, air leaks and ventilation before adding anything. If you want to try, start by talking to a professional about what suits your attic.
How do I get a quote after my walkthrough?
Quotes are given by phone once you describe what you saw, and photos help. Larger or more complicated jobs need an on-site visit first. There is a service call charge, and it is explained on the phone before anyone is dispatched. Call and share your notes, and we will explain the next step.
Describe the situation by phone and we will tell you what the job involves. Quotes are given by phone. Jobs that cannot be quoted without seeing them need a technician on site, and the service call charge is explained on the phone before anyone is dispatched.
(561) 854-1888Related pages
Setting up a safe routine before the first climb
The safest attic check begins long before you touch a ladder. Choose a cool part of the day, usually early morning, and tell someone where you will be. Wear long sleeves, gloves, a dust mask and sturdy shoes, and bring a bright flashlight or headlamp. Check the ladder for stability and make sure it is rated for your weight. Turn off any equipment that might start suddenly, such as a whole-house fan. Keep your phone in a pocket. If you feel dizzy, hot or short of breath, come down at once, because attic heat can build quickly.
Most of the check can happen from the top of the ladder with your head and shoulders through the hatch. Stay on the ladder or a solid platform; do not step onto the insulation or between joists, because ceiling drywall cannot support a person and hidden wiring can be damaged. Sweep the flashlight slowly across the space, from one side to the other, and then back. Look for staining, droppings, displaced material, loose ducts, and hanging wires. Take photographs rather than moving things around. If you need to see farther, mark the spot and call a professional.
Decide in advance what is not your job. Anything that requires crossing the attic, moving insulation, touching wiring or cutting into the roof should be left to professionals. Do not spray foam or sealants yourself, because some products create problems when applied in the wrong place. Write down what you saw and what you did, and keep the notes with your pictures. When you call, the scope and any quote are explained before work begins. Knowing your limits is a form of good maintenance, and it avoids turning a small problem into an injury.
Turning your spring observations into a plan
After the walkthrough, sort what you noticed into three groups: things that are fine, things to watch, and things to act on. Fine items need only a note. Watch items, such as a faint stain or a slightly displaced patch of insulation, deserve a recheck after the next heavy rain. Act-on items include active leaks, signs of animals, loose ducts, and bare spots in the insulation. Giving each item a group keeps you from either ignoring a real problem or panicking over a minor one, and it makes your call to us more productive.
Bring the right people in for the right items. A roofer is the person for flashing, tiles and shingles. An air conditioning company handles the air handler, coil and refrigerant lines. A pest professional deals with animals. Insulation work covers coverage gaps, displaced or damaged material, air sealing around penetrations, and sometimes duct wrap. If you are not sure whose job it is, call us and describe what you found. We will tell you honestly if it belongs to another trade, so you do not pay for the wrong help.
Set reminders for the follow-up. Mark your calendar for a quick fall check, and for the weeks before and after hurricane season. If you sell the home, a record of yearly checks and any work done is valuable, since buyers like to know the attic has been looked after. Store the photos and notes in one folder, with the dates in the file names. Keeping this habit takes only a few minutes each year and pays off in clearer decisions and fewer surprises. It also means that when something does change, you notice it sooner and can describe it accurately.